How to Apply Shellac Nail Polish

This is the first article in a series on  CND Shellac application and removal. Read the second article about how to remove CND Shellac nail polish. This series is intended to help you do it yourself at home.

shop cnd shellac nail polish

Recently I was blessed to participate in a CND Shellac Workshop because I got ‘shellacked’ by an experienced CND Education Ambassador, Michele Huynh.

She did a demonstration on how to apply and remove CND Shellac nail polish.  Her application was flawless and removal was a breeze.  My nail (only one nail got done) looked great. Unfortunately, I didn’t get a chance to know how long it would stay since my shellac was removed the same day…:-(..It had to, so I can show you all on how to remove Shellac.

How to Apply Shellac Nail Polish

1. File edge of the nail with 240-grit nail file, to shape the nail. With CND Shellac, you would never file your nail bed.

how to apply shellac nail polish file nail edge


2.  Push back and clean cuticles with cuticle pusher. Notice that this is a dry manicure.

how to apply shellac nail polish - push cuticle


how to apply shellac nail polish - push cuticle


3. Cut any hang nails or cuticle if necessary with cuticle nipper.

how to apply shellac nail polish - cut hang nails


4. Wipe clean nail with lint-free nail wipe soaked with CND Scrubfresh.

how to apply shellac nail polish - apply scrubfresh


5. Shake, shake vigorously the Shellac Base Coat so the ingredients mix well.

how to apply shellac nail polish - shake shellac base coat


6. Apply a thin coat of Shellac Nail Base Coat. The key to get a good result is to apply every layer thinly, said Michele.

how to apply shellac nail polish - apply shellac base coat


7. Cure under 36-watt Shellac UV Lamp for 10 seconds. Make sure your middle finger touch the end of the tunnel before starting the process.

how to apply shellac nail polish - cure under 36 watt uv lamp


8. Apply a thin layer of Shellac nail polish. In this case, I used Rock Royalty. And cure for 2 minutes under Shellac 36-watt UV lamp. To clean the messy polish application on the cuticle or skin, just use the wood cuticle stick to wipe clean. Do it before curing the polish.


9. Apply another thin layer of Shellac nail polish. And cure for 2 minutes. If necessary, you can apply an extra layer for dark coverage.

how to apply shellac nail polish - apply thin color


10. Apply a thin layer of Shellac Top Coat. And cure for 2 minutes.

how to apply shellac nail polish - apply thin top coat


11. Wipe clean the nail with lint-free nail wipe soaked with 99% Alcohol. It has to be 99% Alcohol. If less than 99% it won’t show the full shine. After wiping, the polish should be dry, hard and not tacky.

how to apply shellac nail polish - wipe alcohol


12. Apply and massage Solar cuticle oil on nails. And here’s  CND Shellac nail polish Rock Royalty.

cnd  shellac rock royalty

cnd  shellac rock royalty

shop cnd shellac nail polish

Tips on CND Shellac Application

I also asked her some questions I often heard regarding CND Shellac application. To keep it short, I’ll just post the answer below:

  • It’s not uncommon to hear customers complain about her nails getting dry after using CND Shellac. Michele suggests to use CND Solar Oil every day to combat this problem. If Solar Oil is used often, there shouldn’t be problem of dry or splitting nails.
  • Regarding nails that are not cured properly, check the bulbs. Perhaps one of the bulbs is out. Also on CND Shellac 36-watt UV lamp, you can press the Reset button to see how many hours left for the current bulbs. Also shake, shake shellac coats or polish to make sure the ingredients mix well.
  • Her choice for French Manicure is Cream Puff or Studio White (an off-white) for the white tip and Clearly Pink and Romantique (more opaque) for the pink. Here’s her French Manicure with Studio White and Clearly Pink.
    cnd shellac french manicure
  • Using less than 99% Alcohol won’t show the full shine of Shellac. Make sure when buying, you get only the 99% Alcohol.
  • For customers with weak or splitting nails who want to use Shellac nail polish, she advices to use Brisa Gel as a foundation before using Shellac. The purpose is to strengthen the nails before applying Shellac.

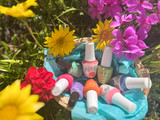
Finally, take a look at these photos on Shellac colors and products that were used.

I noticed using pump bottles like these make application process less messy and easier.

shellac nail products used

CND Shellac Moonlight Roses over Asphalt. Michele was sporting this color. If you like this color, take a look at other photos above. Those purple nails are hers.

cnd shellac asphalt moonlight roses

That pretty red nail is Red Baroness. Two coats with a Top Coat.

cnd shellac red baroness

You can get all these products at Esther’s Nail Center. We have all new CND Shellac Fall 2011 colors in-stock. Check us out.

38 comments ↓

#1 How to Remove Shellac Nail Polish | Esther's Nail Corner on 10.07.11 at 12:45 am

[…] nail polish in a series:  CND Shellac application and removal. Read the first article about how to apply CND Shellac nail polish that you can do at […]

#2 Andri on 10.19.11 at 7:07 pm

I recently bought the whole Shellac system. The UV light, the base coat, the color coat and the top coat, along with other things needed to do the Shellac nails… However, I’ve noticed it is really, really hard for me to do the nails without getting the polish on the cuticles – which causes peeling… Do you have any tips? The very last picture shows a beautiful red color that is not too close to the cuticle – yet – not too far away that it looks abnormal…

Thank you!

Oh – my email is andriannmeccree@yahoo:disqus
.com

#3 Anonymous on 10.21.11 at 5:42 am

Hi, thanks for the comment. Remember that she’s a nail technician, who has done this for years. It takes a lot of practices to do that. But yes, when applying the polish you need to start a little bit further from the cuticle, not on it. But if the polish get messy you can always use a wood cuticle stick to clean the extra polish on the cuticle and skin right before curing (not after). So have some wood sticks and paper towel handy while doing your manicure. 

#4 Lil_dory on 12.05.11 at 6:52 pm

I recently bought the shellac set but for some reason the shellac is peeling off in a couple of days or lifting. It comes of in one whole piece, why is this happening? What am I doing wrong, please help?

#5 Winzle on 12.10.11 at 6:55 pm

Extremely helpful.  Now I will have to try applying for the very first time.
Thank you. 

#6 Tedwards on 03.11.12 at 4:46 pm

What do you do if your nails have no free edge, how do you cap it off?

#7 Lindseyneville on 03.27.12 at 1:44 pm

Hi-
I find that when the nails have no free edge u do the best u can to cap, kinda slop it on the end then clean up the finger tip.. after the 2 weeks of shellac they will have enough free edge.. good luck

#8 Lindseyneville on 03.27.12 at 1:50 pm

If its peeling like that it can be many things.
Too thick of application
Nail bed not being properly cleaned
Shellac on the skin
Not cured properly
Product not mixed completely(shake for an entire minute for best results)
If the base coat isn’t perfectly applied you will have problems.
O and make sure your lights are all in correctly.
Happy shellacing

#9 Sheree Ewin on 03.28.12 at 10:56 am

I have a 6 bulb CND UV gel lamp…can I use this on shellac as well as Brisa gels? 

#10 Shereesmagic on 03.28.12 at 10:59 am

Oops…forgot to ask…if they have short nails…any reason why I can’t put a clear tip on it, buff it in & then apply shellac?? Or doesn’t it bond to a tip???

#11 admin on 04.03.12 at 10:43 pm

as long as it’s 36 watt it can cure Shellac and Brisa

#12 emmade1234 on 04.30.12 at 11:59 am

I have exactly the same problem, after about 2 days the colour will just peel right off in one piece! 

No one really explains what the cause is, i think it might be because i bought a cheaper lamp which doesn’t seem to cure it properly. The Shellac polish seems to need a very strong lamp!

#13 CND Shellac – Your Questions Answered | Esther's Nail Corner on 05.12.12 at 2:01 pm

[…] nail polish, we’ve published a step-by-step, easy to follow, photo tutorials on how to apply CND shellac nail polish and how to remove CND Shellac nail polish. The application and removal processes were done by a CND […]

#14 Jandavis_1954 on 05.28.12 at 7:50 pm

I used Romantique- How do I keep this color from streaking?

#15 Jandavis_1954 on 05.28.12 at 9:35 pm

W/ Romantique I got streaks, I tried Strawberry Smoothie and got better results (still would like to know how to prevent streaks w/ Romantique). W/ Strawberry Smoothie on a couple of nails I ended up w/ bumps and/or dents, what caused this? Did it happen w/ base, color, or top coat? I appreciate any advise to what I may be doing incorrectly.  Thanks

#16 Themarzanos on 06.14.12 at 1:19 pm

Why does white shellac bubble after curring?

#17 admin on 06.14.12 at 3:12 pm

Maybe the application is too thick. Try warm the bottle, shake it vigorously before applying and apply in thin layer.

#18 Travelingwithtrudy on 06.27.12 at 12:56 pm

I put the on  polish to thick how can it dry it

#19 Jane on 04.16.13 at 12:22 am

Tried shell for the first te and i can’t get the top coat to cure. it stayed quite sticky. whtas going wrong? I have a 36w fourbulb machine and left my hand in for ages

#20 admin on 04.25.13 at 11:30 pm

Top coat will be tacky after curing. You need to wipe it with lint-free wipes saturated with 99% alcohol to remove the tackiness and to show the shine. You can get the 99% alcohol here: http://www.esthersnc.com/nail-polish/cnd-shellac/99-isopropyl-alcohol/

#21 Racooner on 07.25.13 at 6:39 am

Help!!! I have done a set of shellac nails on a friend and forgot to put the topcoat on for one foot!! Only realised when she looked at later and nails on one foot shiny and the other matt!!! Do I have to re-do the set or can I put topcoat on if already wiped polish with the isopropyl alcohol??

#22 Ruth on 07.16.14 at 4:12 am

Please help! I have applied cnd shellac just as it says and yet when I take my nails out of the light they are still sticky to touch?? Why?? How can I fix this?
Ruth

#23 Ina MacLeod on 07.17.14 at 5:04 pm

wipe that sticky residue off with a lint free wipe and 99% alcohol. your finished nail is underneath that! 🙂

#24 Ina MacLeod on 07.17.14 at 5:06 pm

better etching and dust off the nail without touching it with your own fingertips (use a nail brush) dehydrate the nail itself before application with 99% alcohol let that dry then apply your base coat.

#25 Ina MacLeod on 07.17.14 at 5:07 pm

the bulbs are 9 watts each – 4 bulb lamps (36 watts total) work best.

#26 Ina MacLeod on 07.17.14 at 5:08 pm

you wipe off that sticky residue with a lint free wipe soaked in 99% alcohol.

#27 sbarron on 01.15.15 at 10:53 am

Sometimes my shellac base coat pulls away from the edges and looks melted????,

#28 EDEL KIELY on 02.19.15 at 8:46 am

Hi

I have uv lamp and first few attempts were perfect but the last two times i am getting severe itching of the fingers and then all the skin under nail breaks. Its like a fungal infection on all fingers and the fingers are so sore to touch. However i went to salon to get the shellac nails done and it was perfect. Cant understand it. I even bought new bottle of base and top coat to see if the others were gone off but its still happening. Please help

Edel

#29 admin on 02.23.15 at 7:28 pm

According to CND, undercuring can cause allergic reaction to gel polish product.
Once cured, Soak-off gel products have very little risk of causing an allergy, but the substances in uncured gel can be allergy producing. This is why it is very important to keep uncured gel off your skin and to ensure you are using a quality curing lamp that is able to fully cure the gel.
We recommend you to use Shellac uv lamp to properly cure the nails if you use Shellac hybrid polish.

#30 elisha on 05.03.15 at 9:24 am

Hi,
I am facing a problem, when I clean and even waited for long nails does not get dry. I am using your products. Please help. Thanks

#31 admin on 05.20.15 at 10:48 am

Hi, after curing it’s normal for the layer to be tacky. You need to wipe it off with 99% alcohol for the TOP COAT layer only. If you have done all procedures right and the polish still tacky, please read about undercuring here :http://blog.esthersnc.com/2015/03/17/undercured-gel-polish-what-and-why/

#32 Fiona Donohue on 07.11.15 at 8:54 pm

ARE YOU BETTER TO USE A UV LAMP OR A LED LAMP FOR CURING. WHAT IS THE DIFFERENCE BETWEEN THEM

#33 admin on 07.31.15 at 6:04 pm

They are similar in the ability to cure gel polish. The difference is only the duration of curing time. For example, CND LED Lamp has shorter curing time of max 60 seconds compare to Shellac UV Lamp for max curing time of 2 minutes.

#34 Kathryn on 01.22.16 at 9:03 am

I recently got a shellac French manicure that ended up with wrinkles in the polish. The manager explained to me that the nail tech kept my hands under the lights for too long and that is what caused it. She was right! The light would automatically shut off, and the nail tech would turn it back on again. So this is just and FYI for anyone who is tempted to let their nails cure longer than what is recommended! Don’t do it!

Now I have another problem. When the manager tried to correct the wrinkles, she simply filed down the white tips and painted over them. The white polish was VERY gummy. Unfortunately, I can now see small chips on the tips of my nails. I feel embarrassed calling to complain. However, I know that small chips will lead to bigger chips!

My first Shellac manicure lasted more than a month!! However, it was rather unsightly as it was red and I never re-polished. So I had a lot of new growth! BUT, the red never peeled nor chipped. And it was still shiny after a month. I thought the French manicure would be ideal as my nails could continue to grow, and I would just re-apply clear polish. But, alas, now there are small chips. I wonder if it was because the polish was gummy, or she did not polish the very ends of my nails??? Any ideas?

#35 Amy on 03.24.16 at 5:12 pm

Help! I used strawberry smoothie for a manicure and when I applied the top coat it was like the polish never cured… I do use a opi light not sure if that is the problem or what? I’m a professional nail tech and this was very embarrassing.. I had to start all over with a different color.

#36 admin on 04.08.16 at 2:48 pm

After you cure the top coat, the layer will still be tacky. Wipe it clean with lint free nail wipes and 99% Alcohol to remove the tacky layer.

#37 Carolyn on 08.09.17 at 6:31 pm

The base coat and color coat are sticky after curing. Do I wipe them with alcohol? I know I have to with top coat. Also is there a matter finish base coat?

#38 Carolyn on 08.09.17 at 6:32 pm

Matt finish base coat not matter.

Leave a Comment